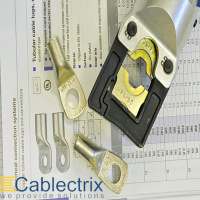
Ensure Correct Pressing of Cable Lugs
To achieve safe, reliable and durable connections, follow these essential steps when pressing cable lugs. Proper preparation, tooling and pressing technique make all the difference.
1. Clean & Prepare the Conductor
Ensure conductors are metallically clean — remove any oxidation (especially on aluminium) and dirt. Brush off any residues. No traces of unwanted material should remain on the conductor as they can lead to contact corrosion.
2. Strip Length & Avoid Damaging Strands
Use a quality wire stripper. Strip the insulation carefully without damaging the conductor strands. The stripped length should be around 10% longer than the lug’s insertion size, because the cable lug tends to extend during pressing.
3. Ensure Tool Inserts / Dies Are Clean & Undamaged
Make sure your pressing tool’s inserts or dies are not damaged or soiled. The profile of the insert should show a metallic sheen. Worn or dirty dies reduce pressing quality.
4. Use a Matching System (Lug + Tool + Manufacturer)
Use lugs and tools from the same manufacturer or a fully compatible system. Mismatched combinations can cause increased contact resistance, poor mechanical strength, and even overheating under load.
5. Crimp Order: Start from Connection Side
For cable lugs, always crimp starting at the connection side and move toward the conductor end. For splice connectors, start from the centre and work outward. This technique ensures even compression and avoids cracking the barrel.
6. Ensure Full Compression
Complete the full crimping cycle — the pressing must be done entirely. Only when the press completes its full travel will proper compression be achieved, which is critical for conductivity and mechanical retention.
7. Choose the Right Tool Type (Mechanical vs Hydraulic)
Mechanical tools work for small to medium cross-sections. For larger cable sizes or frequent use, hydraulic or electro-hydraulic presses are more suitable. Always use properly maintained tools with the correct inserts and crimp profiles.
8. Inspect & Test After Crimping
After crimping, inspect the lug visually for any cracks, improper deformation, or signs of under- or over-pressing. If needed, perform a pull-out test or resistance measurement to confirm mechanical and electrical integrity.


